With most of my Uni coursework completed I've had some time to devote to what I really enjoy doing - playing about with computers while not getting a lot done. Quite good timing as OpenSolaris the distribution of Solaris that is based on Nevada (Solaris 11) has just been released. Of course being a bit impatient I found a copy of RC2a to put onto my Thinkpad x40 a last week and today I just ran pkg refresh and pkg image-update to get the release version on the laptop. The IPS (Image Packet System) seems to be a fantastically nice addition to Solaris - my laptop is currently sucking down Open Office using the command pkg install openoffice. It uses a ZFS root file system to make a easy roll back from badly installed packages. Sticking ZFS and live upgrade style bits together with a package management system makes a huge amount of sense - I have hosed enough systems by ignoring warnings about incompatible packages now I can ignore the warnings and have a get out of jail free option In addition to the built in OpenSolaris IPS repository Blastwave.org and Sunfreeware both have IPS repos. A list of any more that pop up will hopefully be found on the new OpenSolaris.com (not .org) forums.
The RC2a install was a fairly painless procedure - though as this laptop also has Ubuntu and Windows on I had to make some use of Gparted to move partitions around so that the Solaris partition was the first primary this was to work around 6690194. Booting into Ubuntu to create the partition using Linux's fdisk and was enough to convince the OpenSolaris installer it could use the partition. Power Management for my Pentium M does not appear to work out of the box I'm not sure at the moment if this is because it is not supported or because OpenSolaris includes no power management utilities that I have located. This makes is a little less useful as a full time laptop OS than I would like Ubuntu for example will drop my 1.5Ghz CPU to 800Mhz when it is not in use - better for battery life and for my leg skin if the laptop happens to be sitting there. Suspend resume is not there yet. Compwiz fancy effects don't work on my puny graphics card either! (boo! Hiss!)
Since I started writing this post my network connection has flaked out and my OpenOffice download has failed (I appear to be connected to the Internet by a bit of wet string these days) .
The beadm utility that is used to manage ZFS boot environment allows you to view the snapshots that are taken before the upgrade was started - I misread this the first time and though that the snapshots where what was upgraded and stupidly unmounted and destroyed the snapshots thinking they where of no use now that the upgrade had failed. In fact they are a snapshot of the untouched system and would be useful if the upgrade failing left you with an unusable system - as I was just installing Open Office I hope I will be ok. But the lesson to take from that would be to re-read things before using any destroy commands!
I'm going to download todays OpenSolaris Live CD as well and stick it on my desktop to see what the experience is like adding it to a system that already has a Nevada install on - hopefully they can be persuaded to co-exist peacefully - at least until I am prepared to move the system entirely to OpenSolaris.
Monday, May 5, 2008

Wednesday, March 26, 2008
The VMs are taking over!

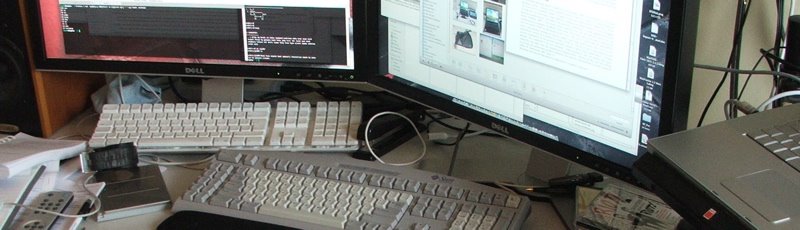
We have a slight issue with abuse of virtualization in this house.
Hosts you can't see as they don't advertise any services the Mac is aware off or are on other subnets include:
Under xVM on Solaris:
centy - cent OS
fariycake - XP
cupcake - XP
Under VMware Fusion on the Mac:
debs - Debian
VirtualBox on the Mac:
MacBunty - Ubuntu 7.10
Haiku - BeOS clone
Parallels on the Mac
React - ReactOS windows clone
Hank - XP
What is more amazing is that I actually find a use for most of them at some point or other. Ok react OS and Haiku are more curiosity than anything else but because of the huge number of virtualization options I have they to can find a home for them.
Now If I can just start to get rid of the boxes of obsolete hardware cluttering up the room I would be set.
Wednesday, February 27, 2008
CentOS 5 domU out of thin air
UPDATE: As Matt pointed out it's DomU not Dom0!
I finally got around to working out how to pull a CentOS install out of thin air without messing about with out of date images from jailtime.org and fiddling about trying to find xen aware kernels to boot (harder than it sounds when you only have one machine of each type of architecture/OS and don't want to dual boot)
root@frank xVM $ virt-install -n centy -r 512 --vcpus=1 --nographics --os-type=linux -p -f /dev/zvol/dsk/tank/xVM/centy -l http://www.mirrorservice.org/sites/mirror.centos.org/5.1/os/x86_64 -d
once its up it will drop you back to the shell prompt and tell you to reconnect for the domain console.
Just do
root@frank xm console centy
to get a console connection and run through the normal install wizard from there.
run through install procedure as normal pulling everything down across the internet - it used to be much slower doing this when I used to install redhat across an ISDN connection - thank you broadband.
I finally got around to working out how to pull a CentOS install out of thin air without messing about with out of date images from jailtime.org and fiddling about trying to find xen aware kernels to boot (harder than it sounds when you only have one machine of each type of architecture/OS and don't want to dual boot)
root@frank xVM $ virt-install -n centy -r 512 --vcpus=1 --nographics --os-type=linux -p -f /dev/zvol/dsk/tank/xVM/centy -l http://www.mirrorservice.org/sites/mirror.centos.org/5.1/os/x86_64 -d
once its up it will drop you back to the shell prompt and tell you to reconnect for the domain console.
Just do
root@frank xm console centy
to get a console connection and run through the normal install wizard from there.
run through install procedure as normal pulling everything down across the internet - it used to be much slower doing this when I used to install redhat across an ISDN connection - thank you broadband.
Solaris Server Setup Notes
Some notes from my solaris server setup - this has post has been sitting half drafted for a while while I tracked down an odd CIFS server and NFS speed issue on my network shares. Turned out to be due to cat5e cables getting trapped in my door and ending up at about Cat2.5 standard. (Don't run cat5 under/over three doors and expect to still be cat5 at the other end!) This weekend we might finally have to get round to running my network ports with trunking.
As I mentioned before I had hit memory remap issues with the mainboard I was using in my home server. Before Christmas I had ordered a new one (ASUS-P5B-VM) but never had the time to fit it. Yesterday I finally found the time and today I'm reinstalling the system - I've decided to just stick to the two 500GB sata drives I had in already but to loose the single 2.5 sata I was booting from.
First thing I had to do was enable the memory remap feature in the BIOS to allow the 64 bit OS to address all the memory.
I was going to use the gui to install but it didn't appear to give me enough control over reconfiguring my Solaris slices so I used a text console down the serial line.
As I mostly access the box down the serial line I also edited /boot/grub/menu.lst and uncommitted
serial --unit=0 --speed=9600
terminal serial
to allow me to select the boot options from grub on the serial line as well.
The new build detects my integrated network cards as an rge device which is nice as the old mainboard didn't. It's also a not a legacy driver so should be possible to be used with vlans or with xVM - which is nice as I now have three network cards in this machine.
bash-3.2# dladm show-link e1000g0 type: non-vlan mtu: 1500 device: e1000g0 rge0 type: non-vlan mtu: 1500 device: rge0 elxl0 type: legacy mtu: 1500 device: elxl0
All my storage was on my zfs file systems so I had to import using the -f flag like so:
bash-3.2# zpool import
pool: tank id: 15184786189135037151
state: ONLINE status: The pool was last accessed by another system. action:
The pool can be imported using its name or numeric identifier and the '-f' flag. see: http://www.sun.com/msg/ZFS-8000-EY config:
tank ONLINE mirror ONLINE c2d0s7 ONLINE c1d0s7 ONLINE
bash-3.2# zfs list no datasets available
bash-3.2# zpool import -f 15184786189135037151
root@frank bin $ zfs list
NAME USED AVAIL REFER MOUNTPOINT
tank 264G 177G 21K /tank
tank/fs 224G 177G 22K /tank/fs
tank/fs/downloads 195G 177G 195G /tank/fs/downloads
tank/fs/home 20.4G 177G 156M /export/home
tank/fs/home/burt 20.3G 177G 11.8G /export/home/burt
tank/fs/home/burt@16-oct-2007 8.44G - 8.61G -
tank/fs/home/burt/groupWork 11.6M 177G 7.25M /export/home/burt/groupWork
tank/fs/home/burt/groupWork@17-oct-2007 4.15M - 4.15M -
tank/fs/home/burt/groupWork@28-nov-2007 160K - 4.86M -
tank/fs/pushy 1.33G 177G 1.33G /tank/fs/pushy
tank/fs/xVM 7.19G 177G 7.19G /tank/fs/xVM
tank/xVM 40.1G 177G 18K /tank/xVM
tank/xVM/bunty 20G 197G 16K -
tank/xVM/cupcake 3.24G 194G 2.70G -
tank/xVM/cupcake@installed 545M - 2.67G -
tank/xVM/fairycake 140M 177G 2.67G -
root@frank bin $
and my home dir, media, xVM machines, uni groupwork, are all back including mountpoints - all sitting happily onto of the mirror.
recreate my group and user and set the passwd:
bash-3.2# groupadd -g 501 burt
bash-3.2# useradd -u 501 -g burt -m -d /export/home/burt burt bash-3.2# passwd burt
I figure I may as well install blastwave now as I usually end up wanting something from there at some point.
bash-3.2# pkgadd -d http://www.blastwave.org/pkg_get.pkg
edit /opt/csw/etc/pkg-get.conf to add a local mirror then get wget
bash-3.2# /opt/csw/bin/pkg-get -i wget
at that point you can install things from blastwave.org, It's not as good as apt-get but it is still dam useful if your looking for lots of utils and don't want to have to compile all from source.
Packages are installed in /opt/csw/bin so your PATH will need editing to make use of them.
after that All I needed to do was edit /boot/grub/menu.lst to select my preferred boot option of an xVM xen hypervisor so I'm in a dom0 (I have a few domU virtulised domains running as well which I use for testing)
I'ts worth noting at this point that if you use live upgrade later the /boot/grub/menu.list file only exits on your first Boot Environment (BE).
root@frank bin $ lustatus
Boot Environment Is Active Active Can Copy
Name Complete Now On Reboot Delete Status
-------------------------- -------- ------ --------- ------ ----------
build80 yes no no yes -
build81 yes yes yes no -
root@frank bin $ ls /boot/grub/menu.lst
/boot/grub/menu.lst: No such file or directory
As you can see I'm booted into build81 at the moment but menu.lst is not where you would expect.
If I mount the BE named build80 then I will find menu.lst on that partition.
root@frank bin $ lumount build80
/.alt.build80
root@frank bin $ ls /.alt.build80/boot/grub/menu.lst
/.alt.build80/boot/grub/menu.lst
So if you install a second BE later and cant find /boot/grub/menu.lst to edit, use lumount to mount it and edit.
This is why you shouldn't mess with you boot order in the BIOS when using live upgrade, even if you are using multiple disks.
Sharing is easy.
root@frank bin $ zfs set sharesmb=on tank/fs/downloads
for cifs shares
root@frank bin $ zfs set sharenfs=on tank/fs/downloads
for nfs shares.
Thats a brief overview of my server it has other stuff running on it - I'm attempting to get the mediatomb upnp server compiled but so far can only get it to compile without libmagic and it fails to correctly identify video media files when run - making it fairly useless at the moment.
As I mentioned before I had hit memory remap issues with the mainboard I was using in my home server. Before Christmas I had ordered a new one (ASUS-P5B-VM) but never had the time to fit it. Yesterday I finally found the time and today I'm reinstalling the system - I've decided to just stick to the two 500GB sata drives I had in already but to loose the single 2.5 sata I was booting from.
First thing I had to do was enable the memory remap feature in the BIOS to allow the 64 bit OS to address all the memory.
I was going to use the gui to install but it didn't appear to give me enough control over reconfiguring my Solaris slices so I used a text console down the serial line.
As I mostly access the box down the serial line I also edited /boot/grub/menu.lst and uncommitted
serial --unit=0 --speed=9600
terminal serial
to allow me to select the boot options from grub on the serial line as well.
The new build detects my integrated network cards as an rge device which is nice as the old mainboard didn't. It's also a not a legacy driver so should be possible to be used with vlans or with xVM - which is nice as I now have three network cards in this machine.
bash-3.2# dladm show-link e1000g0 type: non-vlan mtu: 1500 device: e1000g0 rge0 type: non-vlan mtu: 1500 device: rge0 elxl0 type: legacy mtu: 1500 device: elxl0
All my storage was on my zfs file systems so I had to import using the -f flag like so:
bash-3.2# zpool import
pool: tank id: 15184786189135037151
state: ONLINE status: The pool was last accessed by another system. action:
The pool can be imported using its name or numeric identifier and the '-f' flag. see: http://www.sun.com/msg/ZFS-8000-EY config:
tank ONLINE mirror ONLINE c2d0s7 ONLINE c1d0s7 ONLINE
bash-3.2# zfs list no datasets available
bash-3.2# zpool import -f 15184786189135037151
root@frank bin $ zfs list
NAME USED AVAIL REFER MOUNTPOINT
tank 264G 177G 21K /tank
tank/fs 224G 177G 22K /tank/fs
tank/fs/downloads 195G 177G 195G /tank/fs/downloads
tank/fs/home 20.4G 177G 156M /export/home
tank/fs/home/burt 20.3G 177G 11.8G /export/home/burt
tank/fs/home/burt@16-oct-2007 8.44G - 8.61G -
tank/fs/home/burt/groupWork 11.6M 177G 7.25M /export/home/burt/groupWork
tank/fs/home/burt/groupWork@17-oct-2007 4.15M - 4.15M -
tank/fs/home/burt/groupWork@28-nov-2007 160K - 4.86M -
tank/fs/pushy 1.33G 177G 1.33G /tank/fs/pushy
tank/fs/xVM 7.19G 177G 7.19G /tank/fs/xVM
tank/xVM 40.1G 177G 18K /tank/xVM
tank/xVM/bunty 20G 197G 16K -
tank/xVM/cupcake 3.24G 194G 2.70G -
tank/xVM/cupcake@installed 545M - 2.67G -
tank/xVM/fairycake 140M 177G 2.67G -
root@frank bin $
and my home dir, media, xVM machines, uni groupwork, are all back including mountpoints - all sitting happily onto of the mirror.
recreate my group and user and set the passwd:
bash-3.2# groupadd -g 501 burt
bash-3.2# useradd -u 501 -g burt -m -d /export/home/burt burt bash-3.2# passwd burt
I figure I may as well install blastwave now as I usually end up wanting something from there at some point.
bash-3.2# pkgadd -d http://www.blastwave.org/pkg_get.pkg
edit /opt/csw/etc/pkg-get.conf to add a local mirror then get wget
bash-3.2# /opt/csw/bin/pkg-get -i wget
at that point you can install things from blastwave.org, It's not as good as apt-get but it is still dam useful if your looking for lots of utils and don't want to have to compile all from source.
Packages are installed in /opt/csw/bin so your PATH will need editing to make use of them.
after that All I needed to do was edit /boot/grub/menu.lst to select my preferred boot option of an xVM xen hypervisor so I'm in a dom0 (I have a few domU virtulised domains running as well which I use for testing)
I'ts worth noting at this point that if you use live upgrade later the /boot/grub/menu.list file only exits on your first Boot Environment (BE).
root@frank bin $ lustatus
Boot Environment Is Active Active Can Copy
Name Complete Now On Reboot Delete Status
-------------------------- -------- ------ --------- ------ ----------
build80 yes no no yes -
build81 yes yes yes no -
root@frank bin $ ls /boot/grub/menu.lst
/boot/grub/menu.lst: No such file or directory
As you can see I'm booted into build81 at the moment but menu.lst is not where you would expect.
If I mount the BE named build80 then I will find menu.lst on that partition.
root@frank bin $ lumount build80
/.alt.build80
root@frank bin $ ls /.alt.build80/boot/grub/menu.lst
/.alt.build80/boot/grub/menu.lst
So if you install a second BE later and cant find /boot/grub/menu.lst to edit, use lumount
This is why you shouldn't mess with you boot order in the BIOS when using live upgrade, even if you are using multiple disks.
Sharing is easy.
root@frank bin $ zfs set sharesmb=on tank/fs/downloads
for cifs shares
for nfs shares.
Thats a brief overview of my server it has other stuff running on it - I'm attempting to get the mediatomb upnp server compiled but so far can only get it to compile without libmagic and it fails to correctly identify video media files when run - making it fairly useless at the moment.
Friday, January 11, 2008
cheap mac mini
Been a while since I posted - I've been snowed under with course work and then christmas so haven't been near much more than my laptops - which I try not to break to much as I need them to work.
I stumbled across an unloved 1.66 Core Duo mac mini in the bargain bin of a PCworld. It was missing a power supply and remote and was a base spec with 512mb/70gb with a cdrw/dvd rom drive, it is also a bit yellow - but was going for £200. I immediately decided against buying it as I already have to many computers. A couple of days later I was back buying the thing - my self control is useless. A PSU cost me £30 from play.com and 2gb of ram cost £32 from crucial. Someone supplied me with a 1.83 CoreDuo so that got put in at the same time.
I installed the last licence of Leopard from my families 5 pack of leopard licences. Leopard comes with front row 2.0. A much improved Front Row interface with the added bonus of being able to use the Saphire plugin to make browsing media better. I installed Perian and flip4mac QuickTime components to allow Front Row to play video encoded with pretty much any codec.
Next I need to hook it up to my nfs shares on my Solaris box and it can browse all of my media.
The really nice thing about using front row 2 is that it can connect to other machines in the house to read from itunes collections (like an AppleTV does) means that I don't have to sync my itunes library to the Mini.
I have a script that I'm working on to automatically rip DVDs on insertion using handbrake cli but its still a bit rough round the edges.
I stumbled across an unloved 1.66 Core Duo mac mini in the bargain bin of a PCworld. It was missing a power supply and remote and was a base spec with 512mb/70gb with a cdrw/dvd rom drive, it is also a bit yellow - but was going for £200. I immediately decided against buying it as I already have to many computers. A couple of days later I was back buying the thing - my self control is useless. A PSU cost me £30 from play.com and 2gb of ram cost £32 from crucial. Someone supplied me with a 1.83 CoreDuo so that got put in at the same time.
I installed the last licence of Leopard from my families 5 pack of leopard licences. Leopard comes with front row 2.0. A much improved Front Row interface with the added bonus of being able to use the Saphire plugin to make browsing media better. I installed Perian and flip4mac QuickTime components to allow Front Row to play video encoded with pretty much any codec.
Next I need to hook it up to my nfs shares on my Solaris box and it can browse all of my media.
The really nice thing about using front row 2 is that it can connect to other machines in the house to read from itunes collections (like an AppleTV does) means that I don't have to sync my itunes library to the Mini.
I have a script that I'm working on to automatically rip DVDs on insertion using handbrake cli but its still a bit rough round the edges.
Thursday, November 29, 2007
xVM Windows XP Hosts
I'm still playing around with xVM under build 76 of solaris though as I type build 77 is out to the general public.
I bought some more memory for my system to take it to 4GB to give me some head room to play with domUs, ZFS and SunRay only to find that my BIOS doesn't properly support 4GB. Currently the OS can only talk to 2900 or so MB - the rest has been appropriated by the BIOS. Now of course this being a 64bit OS the 32bit limitations don't apply - unfortunately the BIOS has no memory remap option for 64bit aware OSs I think the chipset does support it as far as I can tell but it looks like ASUS have not implemented it in the V3-P5945G BIOS - most annoying. I've ordered a new mainboard which should do the trick(at least if the BIOS manual I read is to be believed) When that turns up I will reinstall with build 77 - I'm hoping that my problems with biosdev might go away - but I'm not convinced.
Mainly I followed this guide for setting up my HVM domU but with a couple of bits and bobs I have gleaned from the very useful xvm-discuss@sun.com mailing list and the Release Notes have helped me get my XP domU up and running.
6612343
Setting:
set softcall_delay=0x100000
in /etc/system
and
root@frank / $ svccfg -s xvm/xend setprop config/default-nic="e1000g0"
root@frank / $ svcadm refresh xvm/xend
root@frank / $ svcadm restart xvm/xend
To confirm:
root@frank / $ svccfg -s xvm/xend listprop |grep default
config/default-nic astring e1000g0
to make sure it gets the correct network card (I now have two physical cards instead of two vlans to one card after working around my SunRay latency issue)
I also put this in my .hvm file to bridge the interface.
vif = ['mac=0:1b:21:4:b9:1, bridge=e1000g0']
Running the domain
root@frank xVM $ xm create windows-xVM.hmv
Then just vnc to the console, annoyingly Apples screen sharing vnc application doesn't work for connecting to the console session of a dom. Though this is almost definitely a limitation of the client not the server, as most other clients seem to work fine. On the Mac JollyFast VNC seems to be the best free client, vineViewer was a bit nicer but isn't free. vncviewer on Solaris works well as does xtightvncviewer on Ubuntu.
The install was not without some hitches - seemed to hang up and if I didn't have the vnc session open when it prompted for input the domain would get blocked, and I couldn't get back onto the vnc session. Installaition did take a while longer than expected as well.
I'm going to try and dig out some windows server disks at some point as well and give them a go to so I will try and monitor the performance more closely issues then.
I bought some more memory for my system to take it to 4GB to give me some head room to play with domUs, ZFS and SunRay only to find that my BIOS doesn't properly support 4GB. Currently the OS can only talk to 2900 or so MB - the rest has been appropriated by the BIOS. Now of course this being a 64bit OS the 32bit limitations don't apply - unfortunately the BIOS has no memory remap option for 64bit aware OSs I think the chipset does support it as far as I can tell but it looks like ASUS have not implemented it in the V3-P5945G BIOS - most annoying. I've ordered a new mainboard which should do the trick(at least if the BIOS manual I read is to be believed) When that turns up I will reinstall with build 77 - I'm hoping that my problems with biosdev might go away - but I'm not convinced.
Mainly I followed this guide for setting up my HVM domU but with a couple of bits and bobs I have gleaned from the very useful xvm-discuss@sun.com mailing list and the Release Notes have helped me get my XP domU up and running.
6612343
Setting:
set softcall_delay=0x100000
in /etc/system
and
root@frank / $ svccfg -s xvm/xend setprop config/default-nic="e1000g0"
root@frank / $ svcadm refresh xvm/xend
root@frank / $ svcadm restart xvm/xend
To confirm:
root@frank / $ svccfg -s xvm/xend listprop |grep default
config/default-nic astring e1000g0
to make sure it gets the correct network card (I now have two physical cards instead of two vlans to one card after working around my SunRay latency issue)
I also put this in my .hvm file to bridge the interface.
vif = ['mac=0:1b:21:4:b9:1, bridge=e1000g0']
Running the domain
root@frank xVM $ xm create windows-xVM.hmv
Then just vnc to the console, annoyingly Apples screen sharing vnc application doesn't work for connecting to the console session of a dom. Though this is almost definitely a limitation of the client not the server, as most other clients seem to work fine. On the Mac JollyFast VNC seems to be the best free client, vineViewer was a bit nicer but isn't free. vncviewer on Solaris works well as does xtightvncviewer on Ubuntu.
The install was not without some hitches - seemed to hang up and if I didn't have the vnc session open when it prompted for input the domain would get blocked, and I couldn't get back onto the vnc session. Installaition did take a while longer than expected as well.
I'm going to try and dig out some windows server disks at some point as well and give them a go to so I will try and monitor the performance more closely issues then.
Monday, November 19, 2007
Using Live Upgrade to move disks on x86 with a difficult bios
I'm attempting to move my disks around in my OpenSolaris Box - I have a pair of IDE 120Gb which at one point where mirrored using SVM - but I want to use them in another side project so I need to migrate my install from one IDE disk to the space I have left on the pair of SATA drives where my ZFS pool is (there is space left as I did at one point boot from the SATAs before I reinstalled to the IDEs)
First lucreate for a new BE
root@frank / $ lucreate -c b76a-ide -m /:/dev/dsk/c1d0s3:ufs -n b76a-sata
The lustatus to check whats going on:
root@frank / $ lustatus
Boot Environment Is Active Active Can Copy
Name Complete Now On Reboot Delete Status
-------------------------- -------- ------ --------- ------ ----------
b76a-ide yes yes yes Yes -
b76a-sata yes no no no -
root@frank / $
Excellent so I have a identical but relocated boot environment I can use - let luactivate it.
root@frank / $ luactivate b76a-sata
Saving latest GRUB loader.
Setting failsafe console to.
ERROR: No matching BIOS id found for:
ERROR: Cannot determine GRUB id for ABE disk
ERROR: Unable to determine the configuration of the target boot environment.
root@frank / $
Dam - I've hit this problem again. It seems to resolve around the way /sbin/biosdev reports my disks:
root@frank / $ sbin/biosdev
0x80 /pci@0,0/pci-ide@1f,1/ide@0/cmdk@1,0
0x81 /pci@0,0/pci-ide@1f,1/ide@0/cmdk@0,0
root@frank / $
These two disks are my IDEs - but I want to boot off the first SATA disk.
I'm not sure if this is a limitation of my BIOS or a problem with biosdev but what I have done is: (Ugly Hack time).
To get luactivate to work I need to cludge /sbin/biosdev to output something that will work.
I used the output of /sbin/biosdev -d to produce this
root@frank / $ cat /sbin/biosdev
#!/bin/sh
echo "0x80 /pci@0,0/pci-ide@1f,1/ide@0/cmdk@1,0"
echo "0x81 /pci@0,0/pci-ide@1f,1/ide@0/cmdk@0,0"
echo "0x82 /pci@0,0/pci-ide@1f,2/ide@0/cmdk@0,0"
echo "0x83 /pci@0,0/pci-ide@1f,2/ide@0/cmdk@0,0"
exit 0
root@frank / $
I installed grub on the other disk manually, specifying the slice solaris is on
root@frank / $ installgrub /boot/grub/stage1 /boot/grub/stage2 /dev/rdsk/c1d0s3
Solaris boot partition inactive.
stage1 written to partition 0 sector 0 (abs 16065)
stage2 written to partition 0, 260 sectors starting at 50 (abs 16115)
root@frank / $
Then I mounted the new BE and copied menu.lst from my active boot enviorment on the IDE disk to the new SATA disk.
root@frank / $ lumount b76a-sata
/. alt.b76a-sata
root@frank / cp /boot/grub/menu.lst /. alt.b76a-sata/boot/grub/menu.lst
Unmount the new BE and activate
root@frank / $ luactivate b76a-sata
reboot and catch the bios and change the disk order to boot from the SATA disk.
Because the system is now hopelessly confused (a bit like me) about which disk is where so my /boot/grub/menu.lst was quite wrong it was attempting to use (hd3,0,d) as my boot slice for the sata dissk so I had to edit it manually at boot to point to (hd0,0,d) - and then once again edit the /boot/grub/menu.lst to match.
The reason for this editing is that I changed the order the disks are chosen from within the bios as otherwise it will continue to boot from the first IDE disk. Basically once the system comes up from the sata disk if I run the original biosdev i get this:
root@frank / $ /sbin/biosdev
0x82 /pci@0,0/pci-ide@1f,1/ide@0/cmdk@1,0
0x83 /pci@0,0/pci-ide@1f,1/ide@0/cmdk@0,0
root@frank / $
Which are the SATA disks. lustatus shows the correct information as well now.
root@frank / $ lustatus
Boot Environment Is Active Active Can Copy
Name Complete Now On Reboot Delete Status
-------------------------- -------- ------ --------- ------ ----------
b76a-ide yes no no yes -
b76a-sata yes yes yes no -
At this point I pulled the IDE disks from the machine (ludelete is also confused because of incorrect biosdev info so wont delete them.) Though I forgot to fix my swap partition and the system failed to boot until I sorted that out. A quick vi session in /etc/vfstab to change the swap partition and the clear the error using svcadm:
root@frank / $ svcadm clear svc:/system/filesystem/local:default
There is some more fiddling to do in /boot/grub/menu.lst to fix the xVM entries and some nasty undocumented mucking around in /etc/lutab to remove the old ide entries but finally I'm back where I started but with a couple of IDE disks to play with ZFS on my mac. (now I need to find some IDE USB caddies)
As I side note I've finally found a use for the PIP (picture in picture) function on my Dell 24 Pannel - I attach a S-Video cable to the output of my graphics card so that I can fiddle with the bios on the server without swapping inputs - though serial redirection in the BIOS would be nicer.
I really miss OBP.
First lucreate for a new BE
root@frank / $ lucreate -c b76a-ide -m /:/dev/dsk/c1d0s3:ufs -n b76a-sata
The lustatus to check whats going on:
root@frank / $ lustatus
Boot Environment Is Active Active Can Copy
Name Complete Now On Reboot Delete Status
-------------------------- -------- ------ --------- ------ ----------
b76a-ide yes yes yes Yes -
b76a-sata yes no no no -
root@frank / $
Excellent so I have a identical but relocated boot environment I can use - let luactivate it.
root@frank / $ luactivate b76a-sata
Saving latest GRUB loader.
Setting failsafe console to
ERROR: No matching BIOS id found for:
ERROR: Cannot determine GRUB id for ABE disk
ERROR: Unable to determine the configuration of the target boot environment
root@frank / $
Dam - I've hit this problem again. It seems to resolve around the way /sbin/biosdev reports my disks:
root@frank / $ sbin/biosdev
0x80 /pci@0,0/pci-ide@1f,1/ide@0/cmdk@1,0
0x81 /pci@0,0/pci-ide@1f,1/ide@0/cmdk@0,0
root@frank / $
These two disks are my IDEs - but I want to boot off the first SATA disk.
I'm not sure if this is a limitation of my BIOS or a problem with biosdev but what I have done is: (Ugly Hack time).
To get luactivate to work I need to cludge /sbin/biosdev to output something that will work.
I used the output of /sbin/biosdev -d to produce this
root@frank / $ cat /sbin/biosdev
#!/bin/sh
echo "0x80 /pci@0,0/pci-ide@1f,1/ide@0/cmdk@1,0"
echo "0x81 /pci@0,0/pci-ide@1f,1/ide@0/cmdk@0,0"
echo "0x82 /pci@0,0/pci-ide@1f,2/ide@0/cmdk@0,0"
echo "0x83 /pci@0,0/pci-ide@1f,2/ide@0/cmdk@0,0"
exit 0
root@frank / $
I installed grub on the other disk manually, specifying the slice solaris is on
root@frank / $ installgrub /boot/grub/stage1 /boot/grub/stage2 /dev/rdsk/c1d0s3
Solaris boot partition inactive.
stage1 written to partition 0 sector 0 (abs 16065)
stage2 written to partition 0, 260 sectors starting at 50 (abs 16115)
root@frank / $
Then I mounted the new BE and copied menu.lst from my active boot enviorment on the IDE disk to the new SATA disk.
root@frank / $ lumount b76a-sata
/.
Unmount the new BE and activate
root@frank / $ luactivate b76a-sata
Because the system is now hopelessly confused (a bit like me) about which disk is where so my /boot/grub/menu.lst was quite wrong it was attempting to use (hd3,0,d) as my boot slice for the sata dissk so I had to edit it manually at boot to point to (hd0,0,d) - and then once again edit the /boot/grub/menu.lst to match.
The reason for this editing is that I changed the order the disks are chosen from within the bios as otherwise it will continue to boot from the first IDE disk. Basically once the system comes up from the sata disk if I run the original biosdev i get this:
root@frank / $ /sbin/biosdev
0x82 /pci@0,0/pci-ide@1f,1/ide@0/cmdk@1,0
0x83 /pci@0,0/pci-ide@1f,1/ide@0/cmdk@0,0
root@frank / $
Which are the SATA disks. lustatus shows the correct information as well now.
root@frank / $ lustatus
Boot Environment Is Active Active Can Copy
Name Complete Now On Reboot Delete Status
-------------------------- -------- ------ --------- ------ ----------
b76a-ide yes no no yes -
b76a-sata yes yes yes no -
At this point I pulled the IDE disks from the machine (ludelete is also confused because of incorrect biosdev info so wont delete them.) Though I forgot to fix my swap partition and the system failed to boot until I sorted that out. A quick vi session in /etc/vfstab to change the swap partition and the clear the error using svcadm:
root@frank / $ svcadm clear svc:/system/filesystem/local:default
There is some more fiddling to do in /boot/grub/menu.lst to fix the xVM entries and some nasty undocumented mucking around in /etc/lutab to remove the old ide entries but finally I'm back where I started but with a couple of IDE disks to play with ZFS on my mac. (now I need to find some IDE USB caddies)
As I side note I've finally found a use for the PIP (picture in picture) function on my Dell 24 Pannel - I attach a S-Video cable to the output of my graphics card so that I can fiddle with the bios on the server without swapping inputs - though serial redirection in the BIOS would be nicer.
I really miss OBP.
Subscribe to:
Posts (Atom)